How to Manually Release Truck Brakes or cage brakes
Words and Illustrations by Howard Shanks
In certain emergency situations, for instance, when an air brake system failure has happened and you need to move your truck to a safe position you may need to manually release the brakes to enable the vehicle to be moved. But before we get into this technical advice article, it is extremely important to understand that when a spring brake is manually released that particular brake will not function and that wheel will have no braking at all.
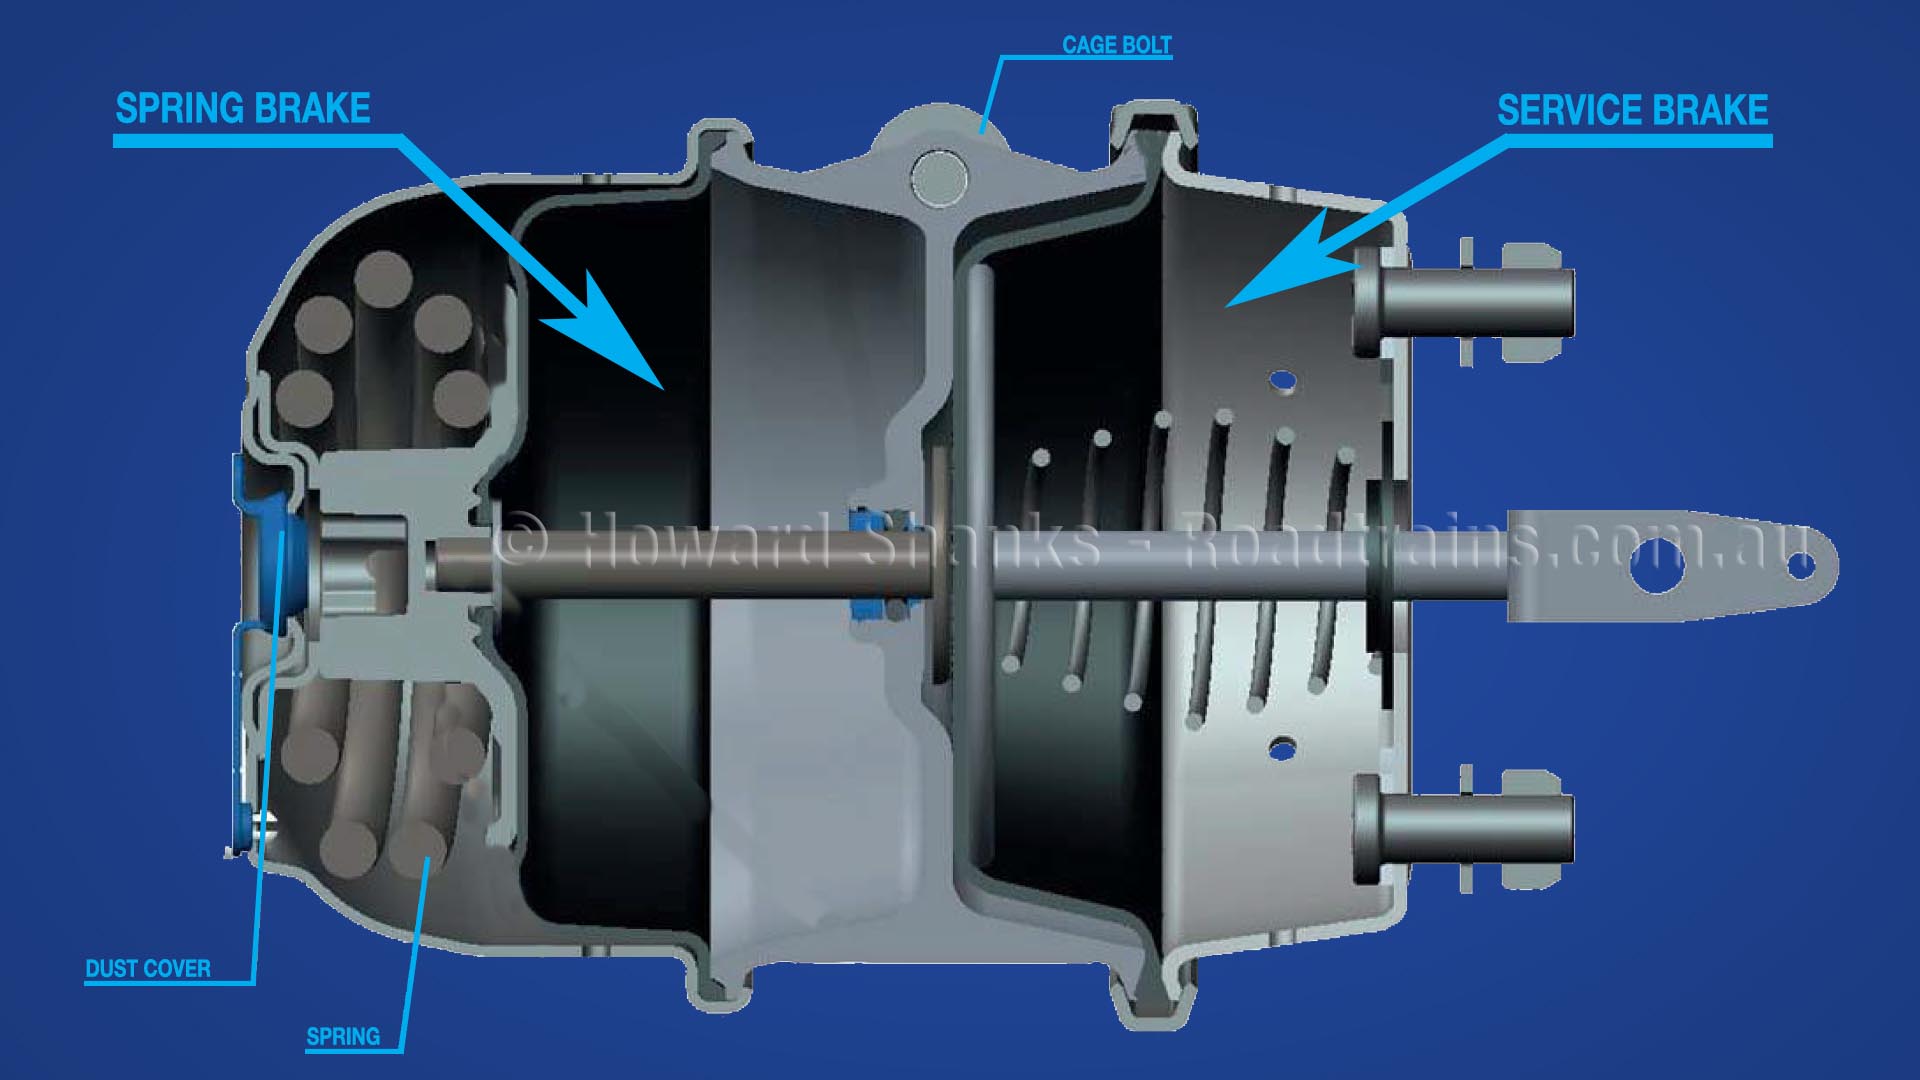 But first things first, what are spring brakes and what do they do? Heavy vehicle spring brakes are designed to provide two separate functions. One is to activate in an emergency if your service brakes fail and secondly to act as park brakes for parking the vehicle. Regulations dictate that all vehicles with air brake systems must have a means of stopping the vehicle if the service brakes (air system) fails. Most heavy truck manufacturers combine this function of the emergency braking system with a parking-brake system using spring brakes as discussed earlier.
Unlike service brakes, spring brakes are not air applied. They only apply when air pressure leaves the spring brake chamber which causes the large spring to expand that in turn forces the brake shoe firmly against the brake drum. They will only release when enough air pressure builds up inside the brake chamber to compress the spring. Spring brakes use a separate brake chamber from the service brakes. A combination brake booster that includes both service brake and spring brake sections is called a spring brake chamber and for most heavy trucks, it’s known as a Type-30/30. Some medium trucks may have a Type 24/30 brake chamber. The first number after the word “Type” refers to the size of the service brake chamber, and the second number the spring brake chamber. For example, a Type-30/30 brake booster would have a size 30 service brake diaphragm and size 30 spring brake diaphragm.
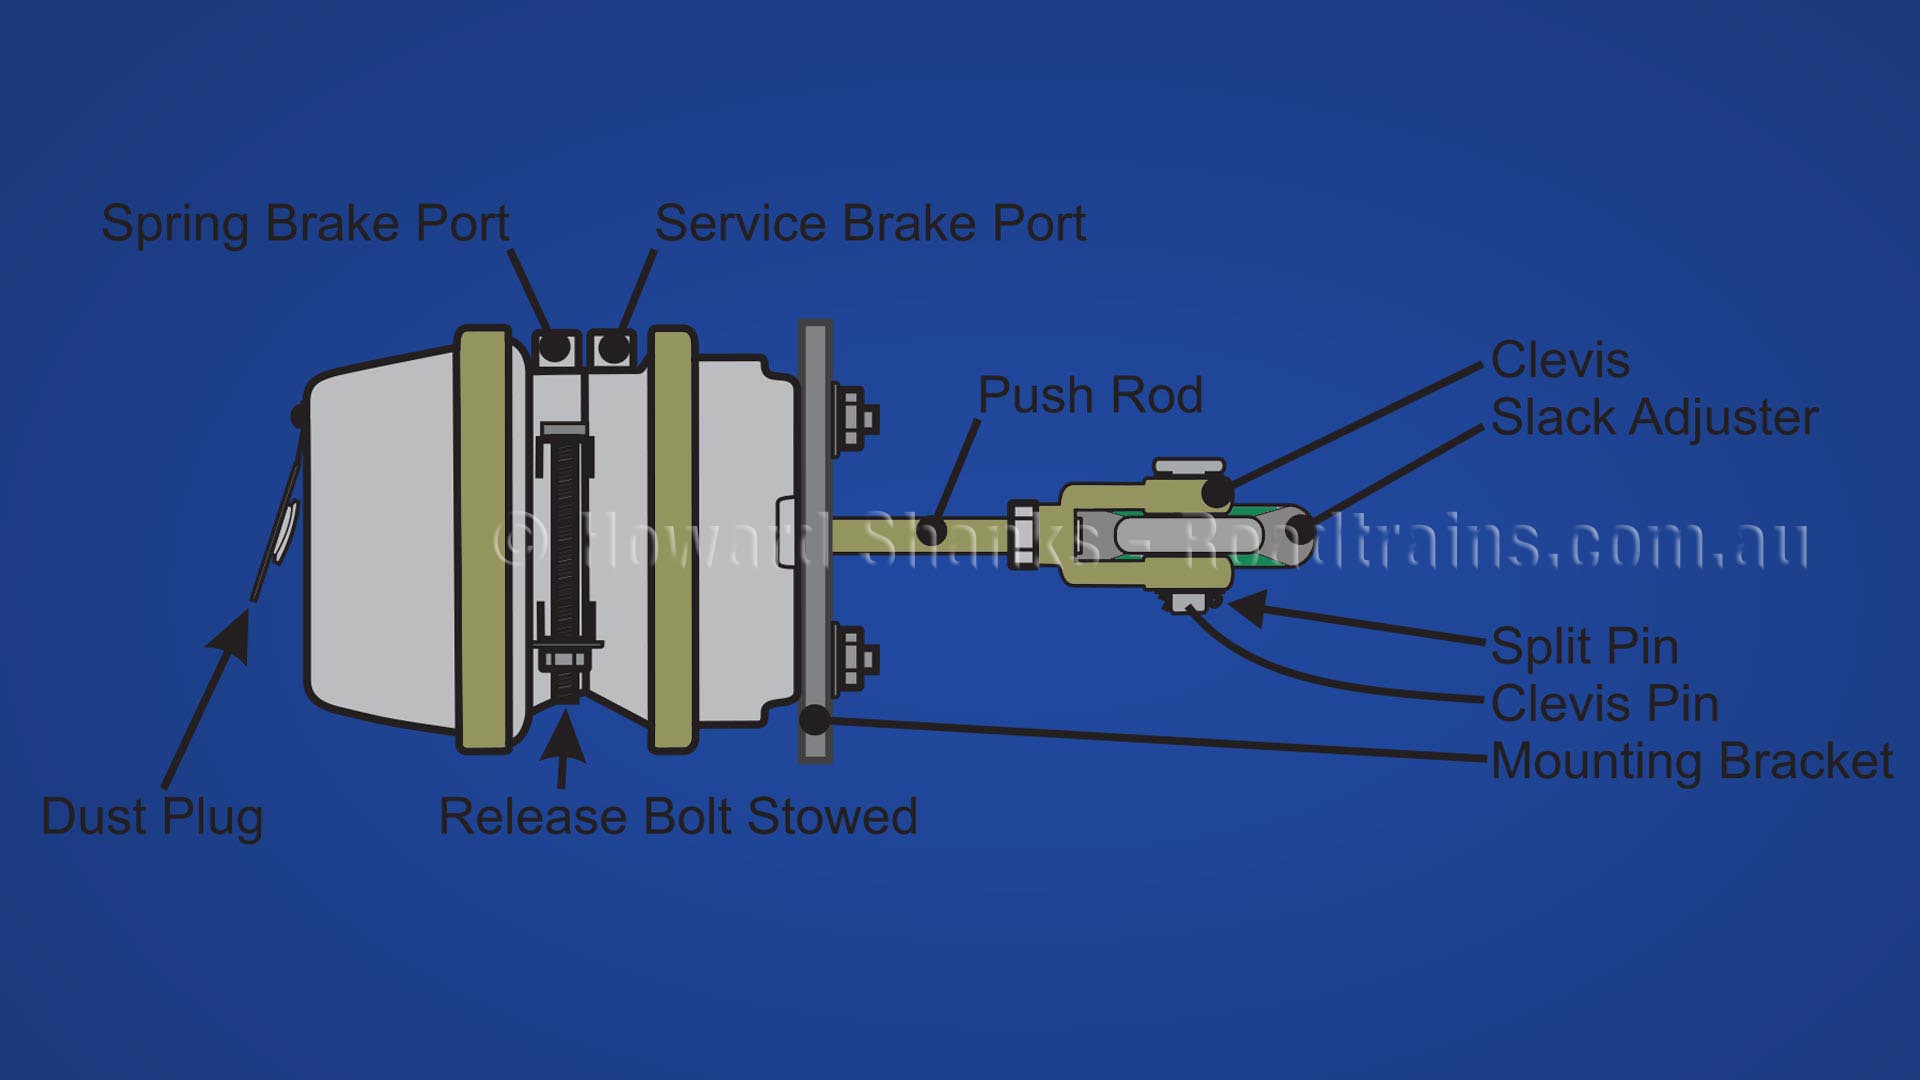 To accommodate the large coil spring, a section is added to the service brake chamber that is clearly visible and adds significantly to its size. This spring brake section is “piggy-backed” onto the service brake section and these two sections function as two separate chambers. The portion nearest the pushrod end is the service brake section and it works in the same manner as a separately mounted service brake chamber.
Most heavy vehicles require at least 60 PSI (414kPA or 4Bar) of air pressure to compress or “cage” the spring inside the brake chamber. When the brake’s spring is “caged” or compressed the brake is in the released state and will require a delivery of air pressure from the brake pedal to apply. Conversely, if the air pressure in the vehicle’s air system falls below 60PSI (414 kPA) then the spring releases and starts to apply the brakes as there is no longer enough air pressure to keep the spring compressed. That is why it is important to ensure that both the primary and secondary brake systems are fully charged to 90 – 110 PSI (690 – 758kPa) before driving the vehicle.
 A word of caution about servicing spring brakes, DON’T. For two reasons, firstly as the large coil spring used in the brake chamber is compressed under very high tension it is extremely difficult to release the tension safely yet alone reinstall it once it’s apart. Secondly, brand-new replacement Type-30/30 spring brake boosters retail between $40 – $50 and according to the Bendix Removal & Replacement Labour Allowance Schedule (BW1322) it should take approximately 0.9 of hour’s labour to remove and replace a spring brake booster. Therefore, it’s not only cheaper to replace a faulty chamber with a new one it’s far safer too.
On a trip in the not too distant future you might find yourself stranded with a wheel that’s locked up because the brakes have jammed. Chances are you’ll be stuck on a lonely road, way out the back blocks, miles from phone range and any chance to getting a callout vehicle to come to the rescue. The good news is, if you’ve read the article this far you’ll now know you’ve got a reasonable understanding of how the brakes on your truck function you’ll be able to get yourself rolling again rather quickly.
 Once you have identified which wheel or axle has locked up you need to slide under the vehicle and remove the dust plug on that faulty wheel or axle’s spring brake chamber.
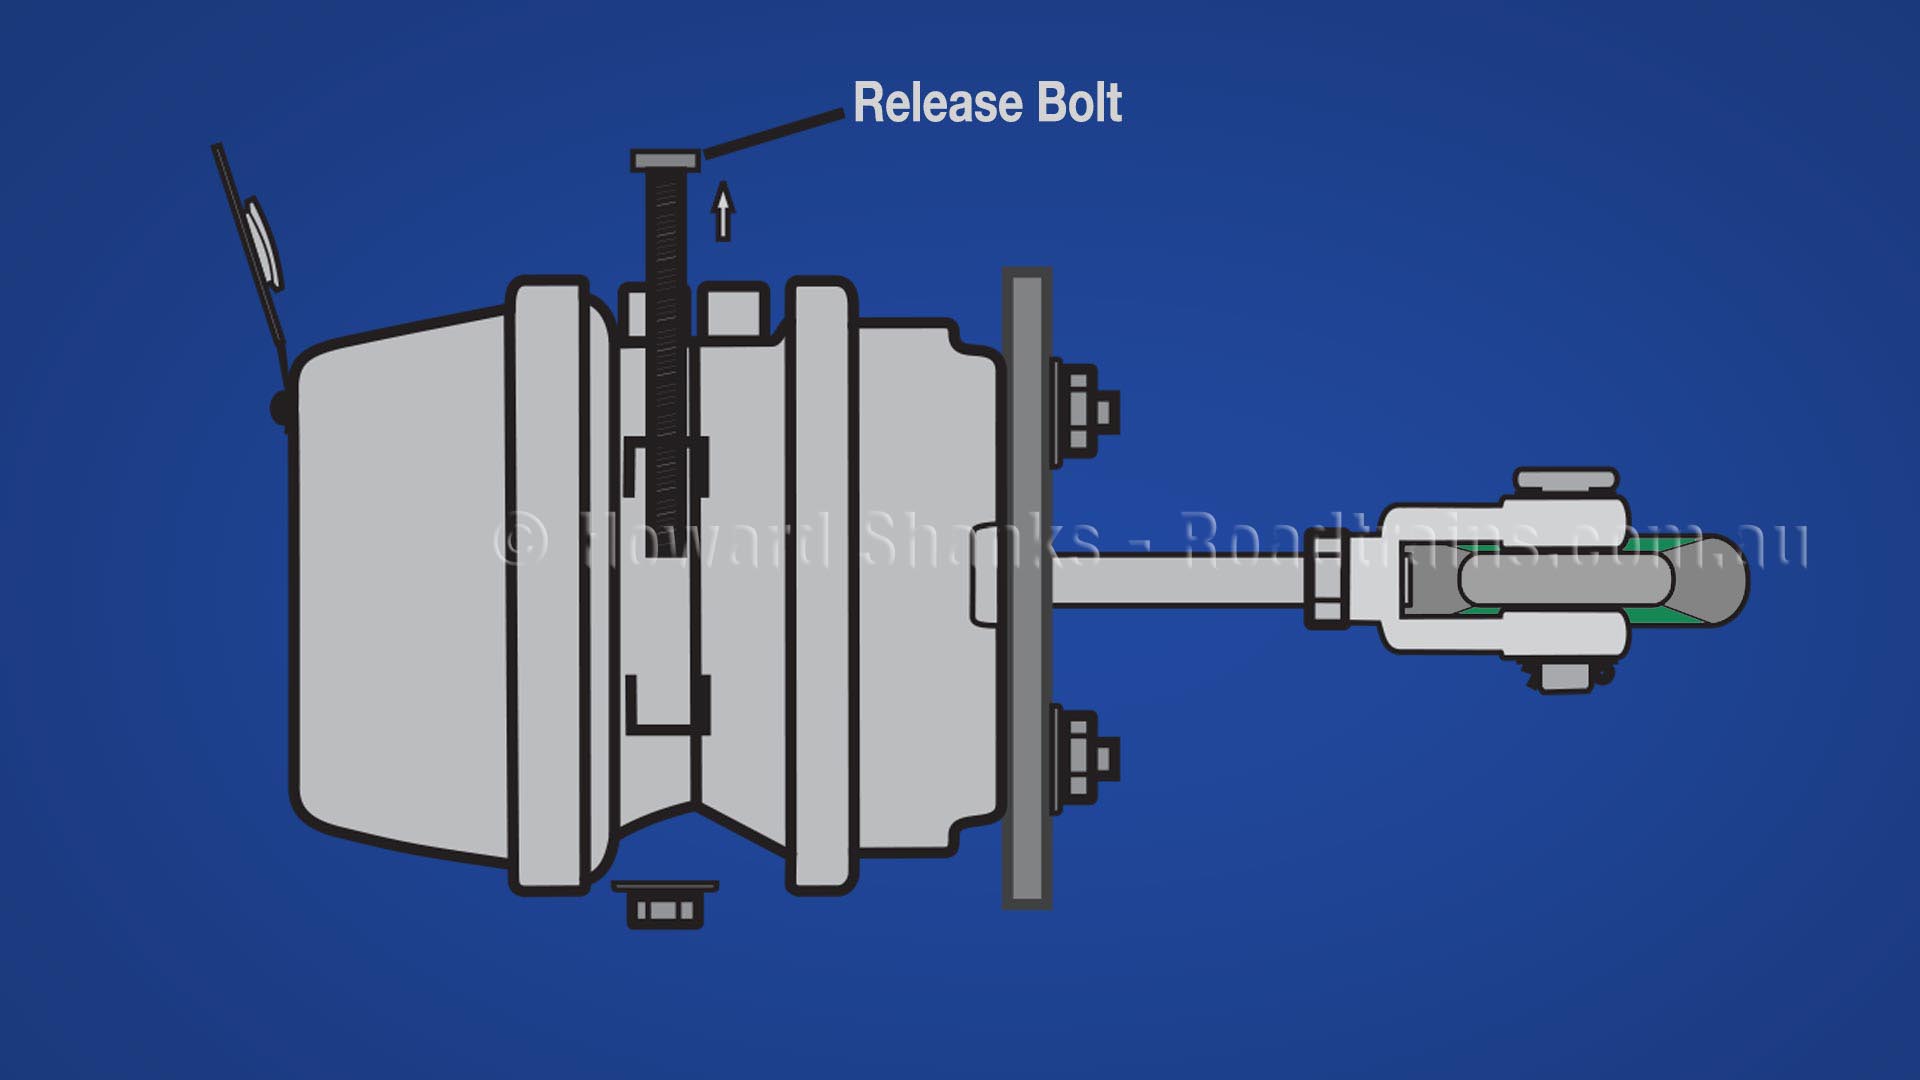
Remove the release bolt assembly from the side pocket. To do this remove the release nut and washer from the release bolt, then slide the release bolt out of the holder.
Clean the threads along the length of the release bolt as this will make it easier to tighten the nut later.
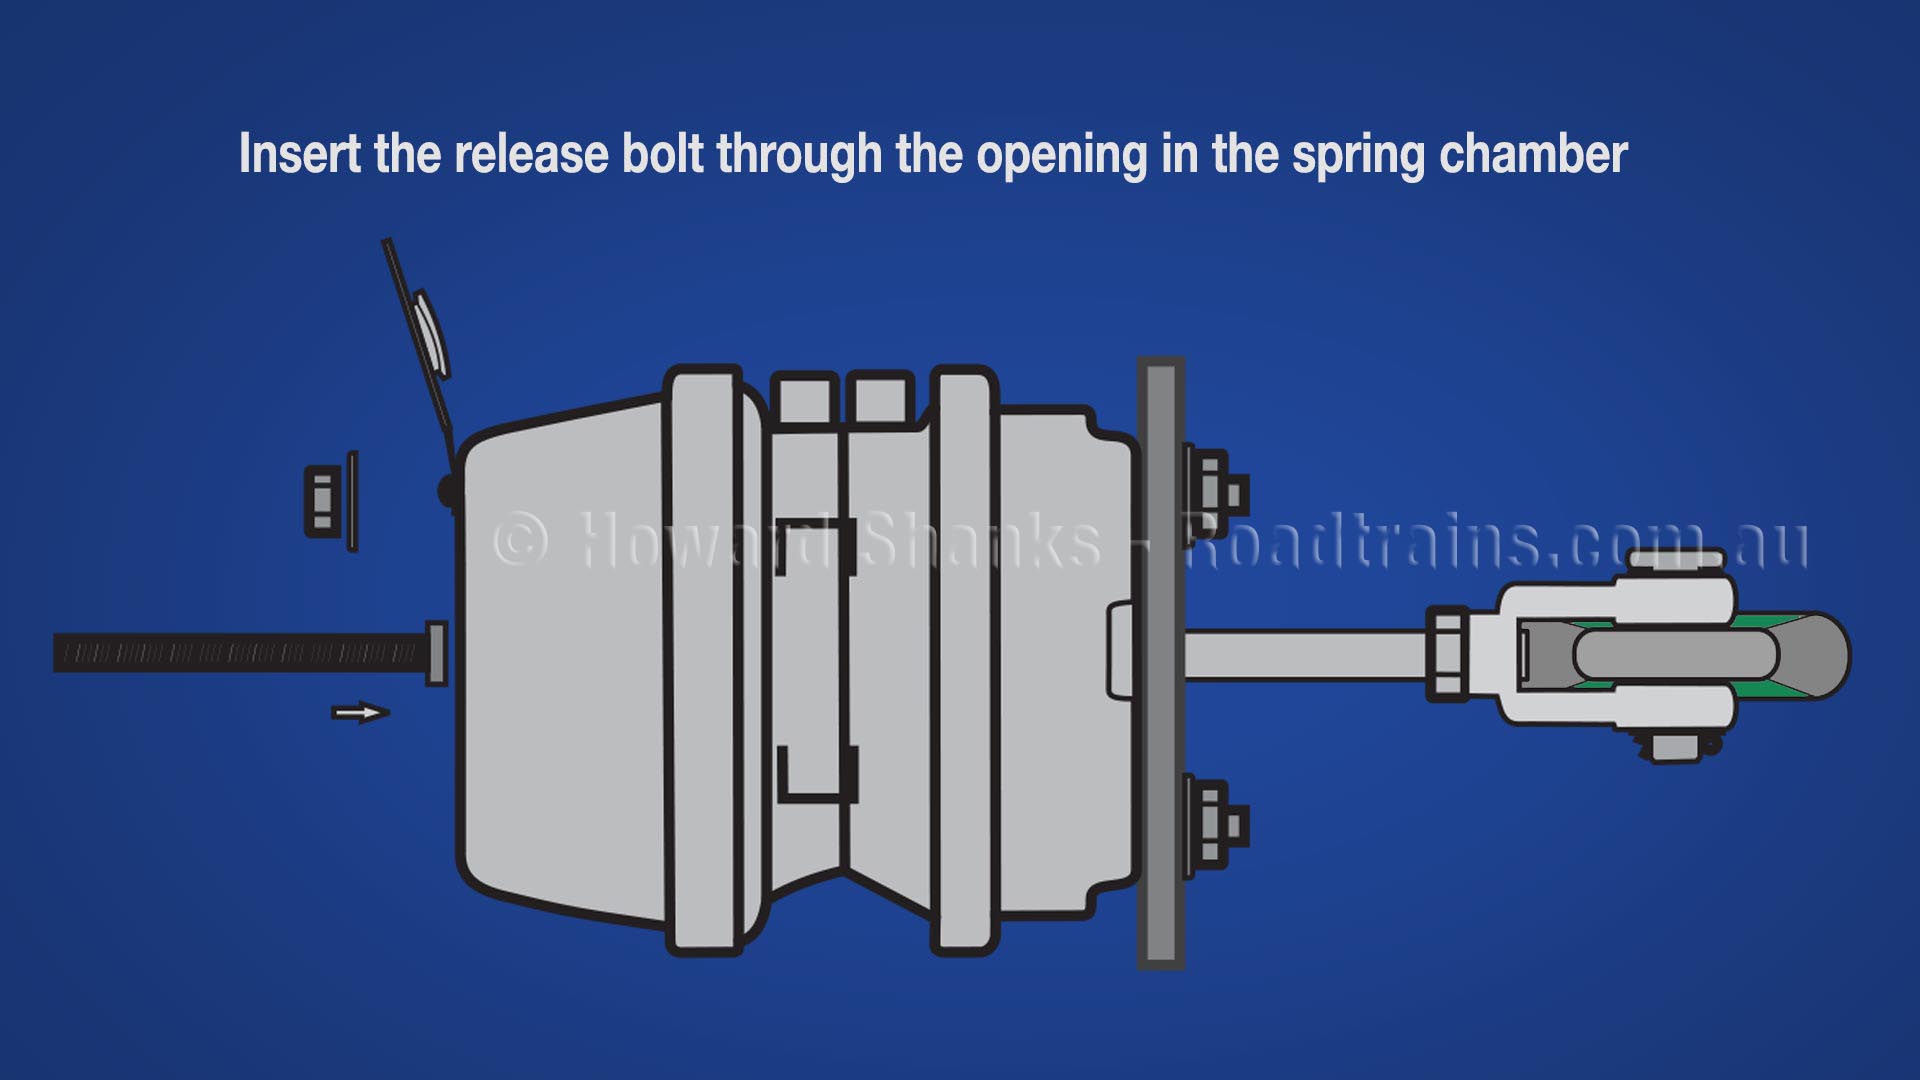
Insert the release bolt through the opening in the rear of the spring chamber where the plug was removed, inserting it into the pressure plate.
Turn the release bolt 1/4 turn clockwise in the pressure plate. This secures the cross pin into the cross-pin area of the pressure plate and locks it into the manual release position.

Assemble the release bolt washer and nut on the release stud.
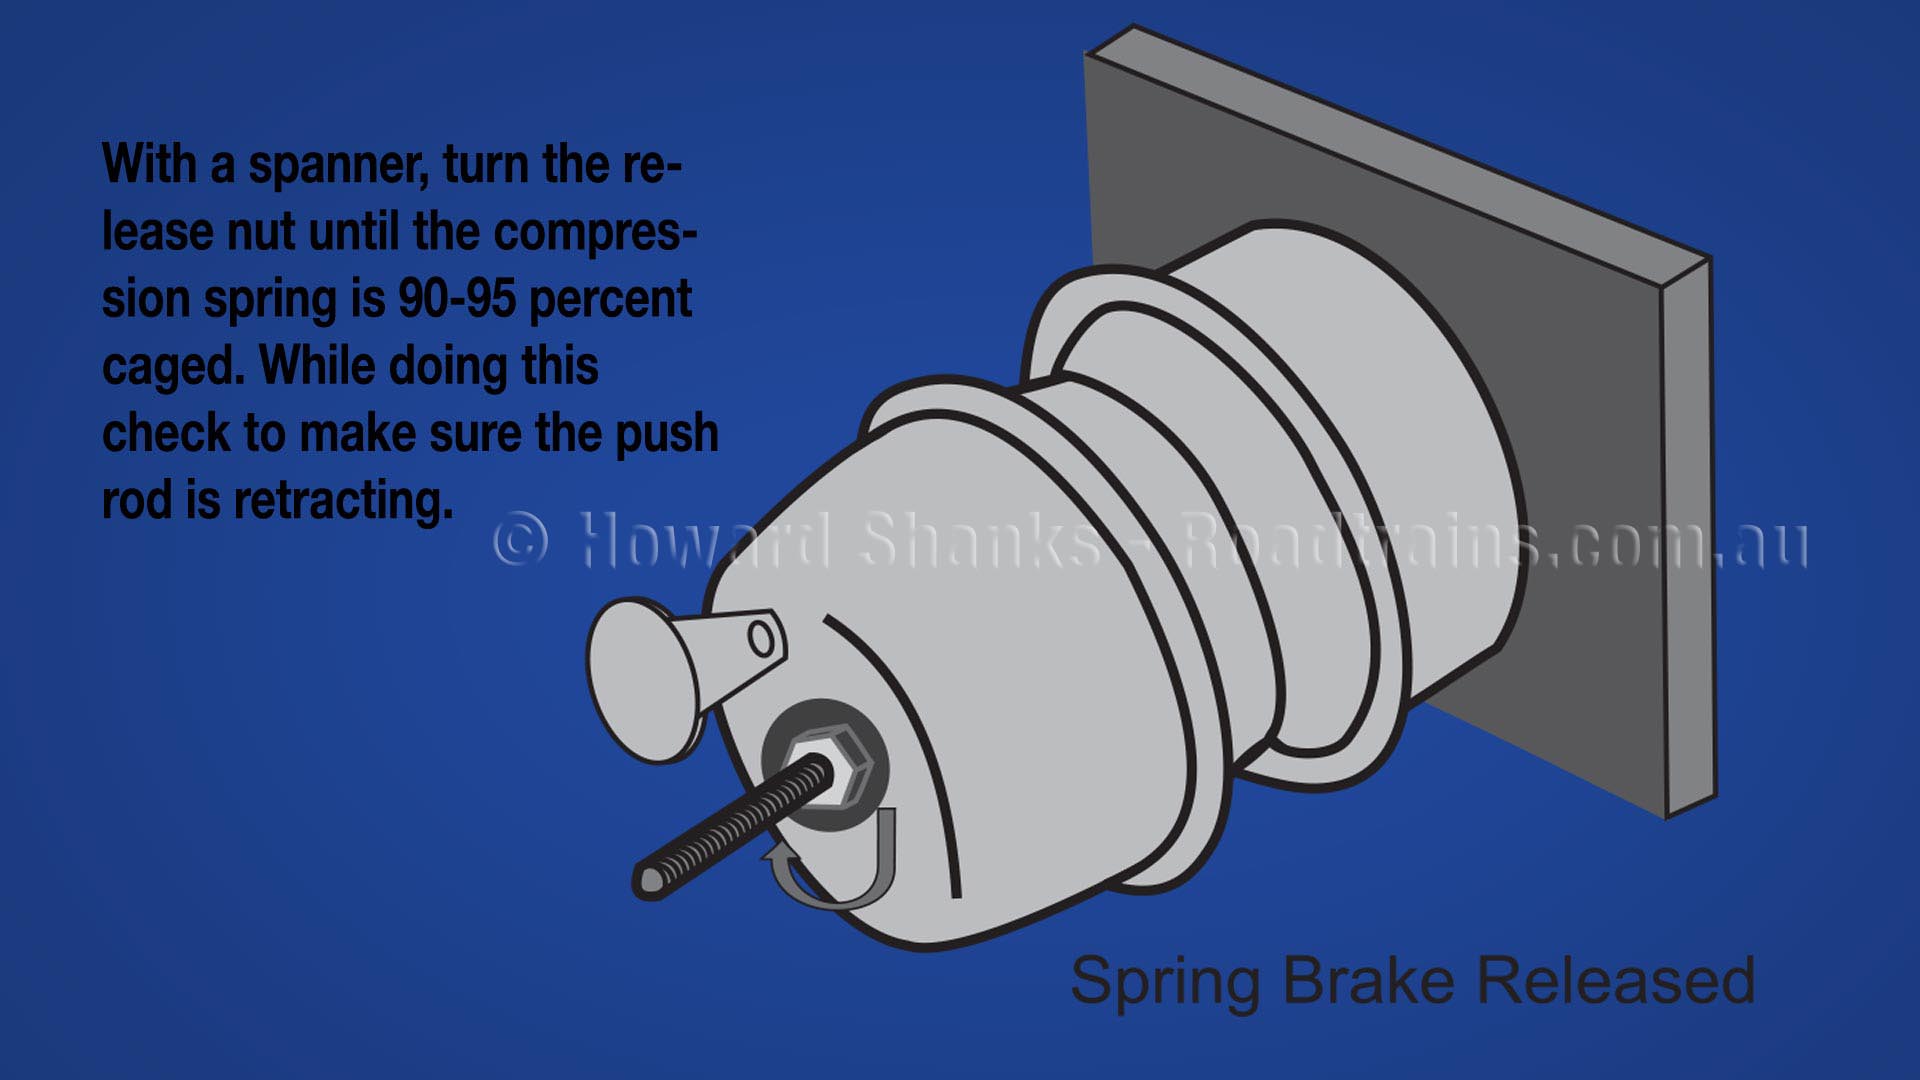
With a spanner, turn the release bolt assembly nut until the compression spring is 90-95 percent caged. You will find that the nut is hard to wind because you are manually compressing the high tension spring. While doing this, check to make sure the pushrod (adapter push rod or service push rod) is retracting. Do not over-torque the release bolt assembly, S-Cam Type 30/30 maximum: 68 Nm 50ft-lbs).
Now the brake is mechanically “caged” and the brake will not function. Extreme care should be used when moving a vehicle with the brakes in the “caged” position.
Again, we cannot emphasise that this procedure should only be used in the case of an emergency and the brake system will need to be repaired by an authorised service center at the earliest opportunity.
