


In this technical tip article, we’ll look at when to check the locking mechanism adjustment of a Jost fifth wheel and, importantly, how to perform the adjustment to return the fifth wheel to the manufacturer’s recommended specification.
As a rough rule of thumb, the perfect time to check the adjustment of the fifth wheel is while servicing the truck. Jost literature (LT SK37U-03 REV.K) recommends that inspection and adjustment of a fifth wheel get performed every three months or 50,000km (30,000 miles).
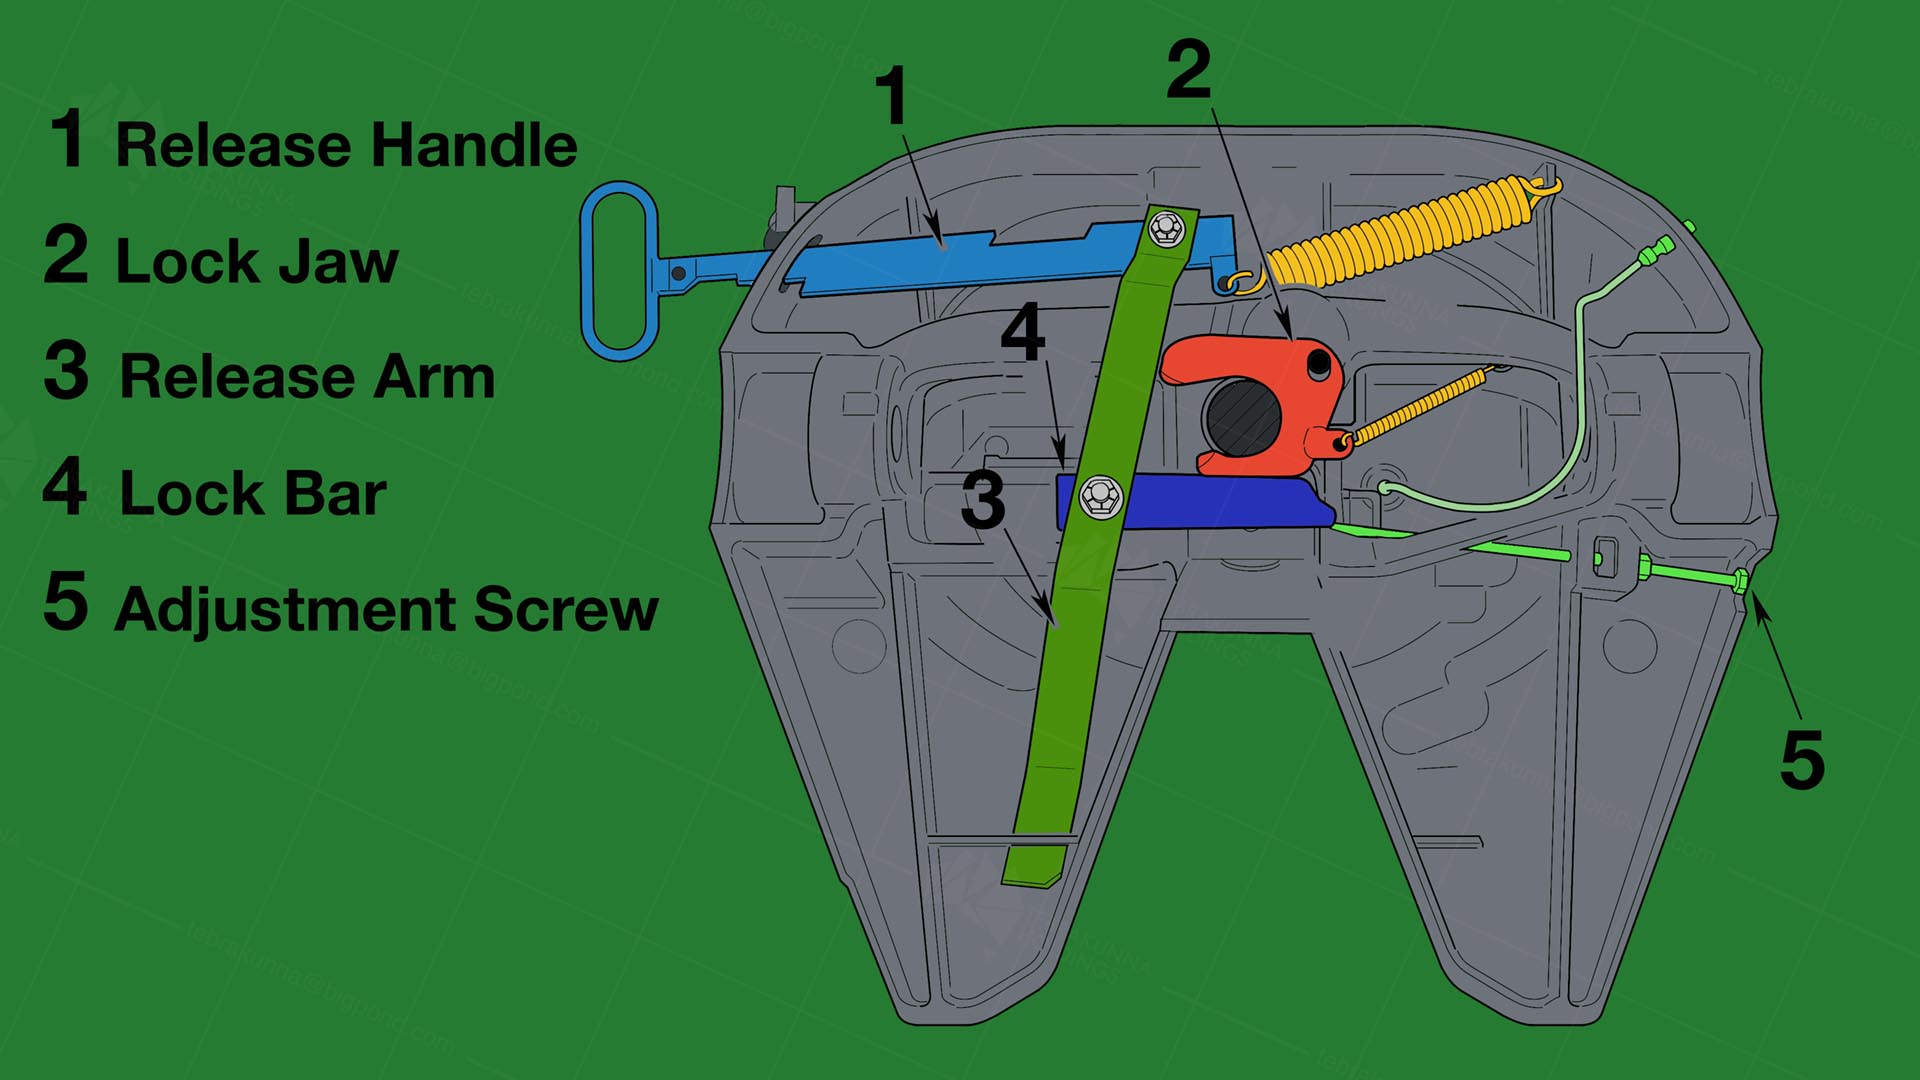
Main components of a Jost 5th Wheel
But first, let’s look at the construction of the Jost fifth wheel. It has four moving parts; the release handle, release arm, the lock bar and the lockjaw. These locking components are all connected. When the handle is out it indicates the fifth wheel is unlocked and conversely when the handle is in and the secondary safety catch down the fifth wheel is locked.
The lock bar is tapered and regulates the lockjaw tightness. Note that the lockjaw position moves forward and backwards as the lock bar is adjusted. The sole purpose of the adjustment screw is to prevent the lock bar from jamming the lockjaw too tightly around the kingpin. When the fifth wheel is correctly adjusted and the lockjaw is closed, the adjustment screw rests against the lock bar maintaining proper clearance (0.3mm) around the kingpin.
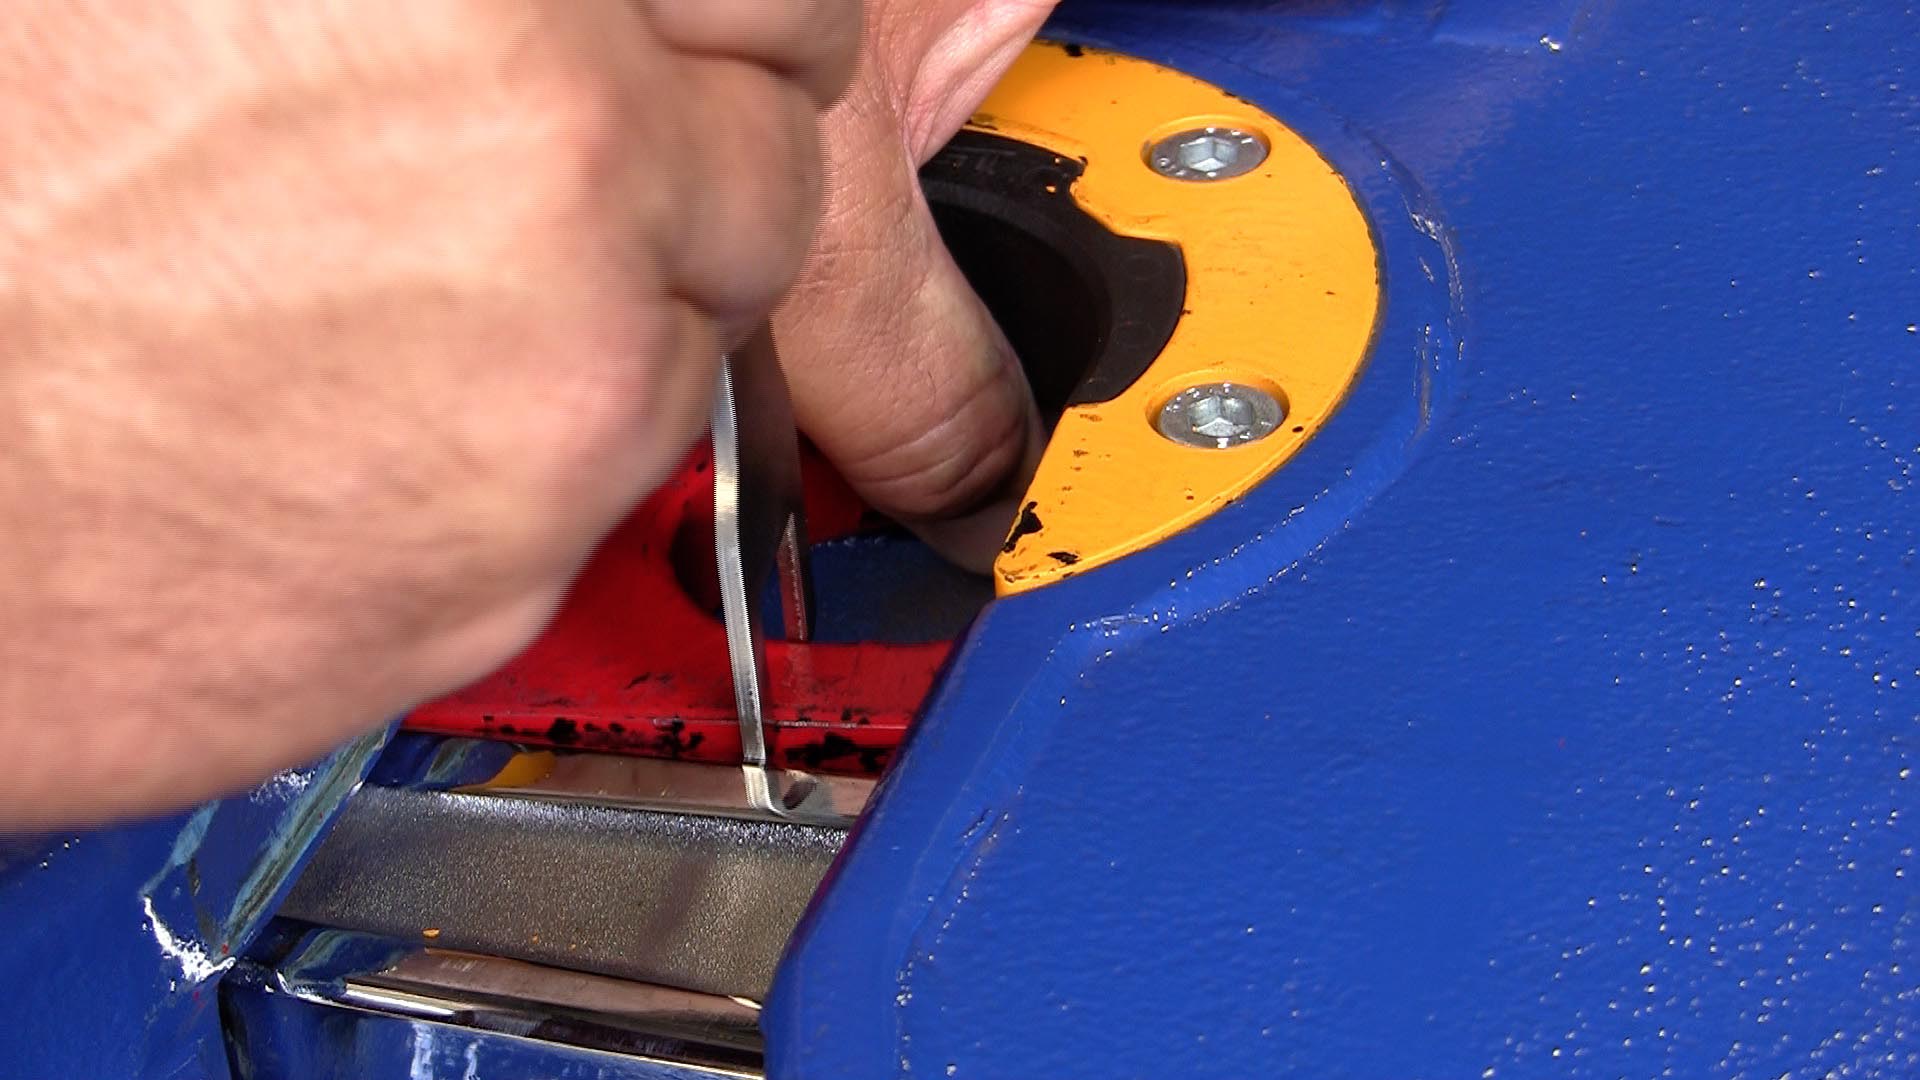
The lock adjustment screw is located on the left-hand side of the fifth wheel when the fifth wheel is mounted correctly to the truck.
To simplify the inspection and adjustment procedure, Jost has a range of specialised testing tools available from most reputable parts outlets. All the tools are available in either a 2-inch (50mm) or 3.5-inch (90mm) version.
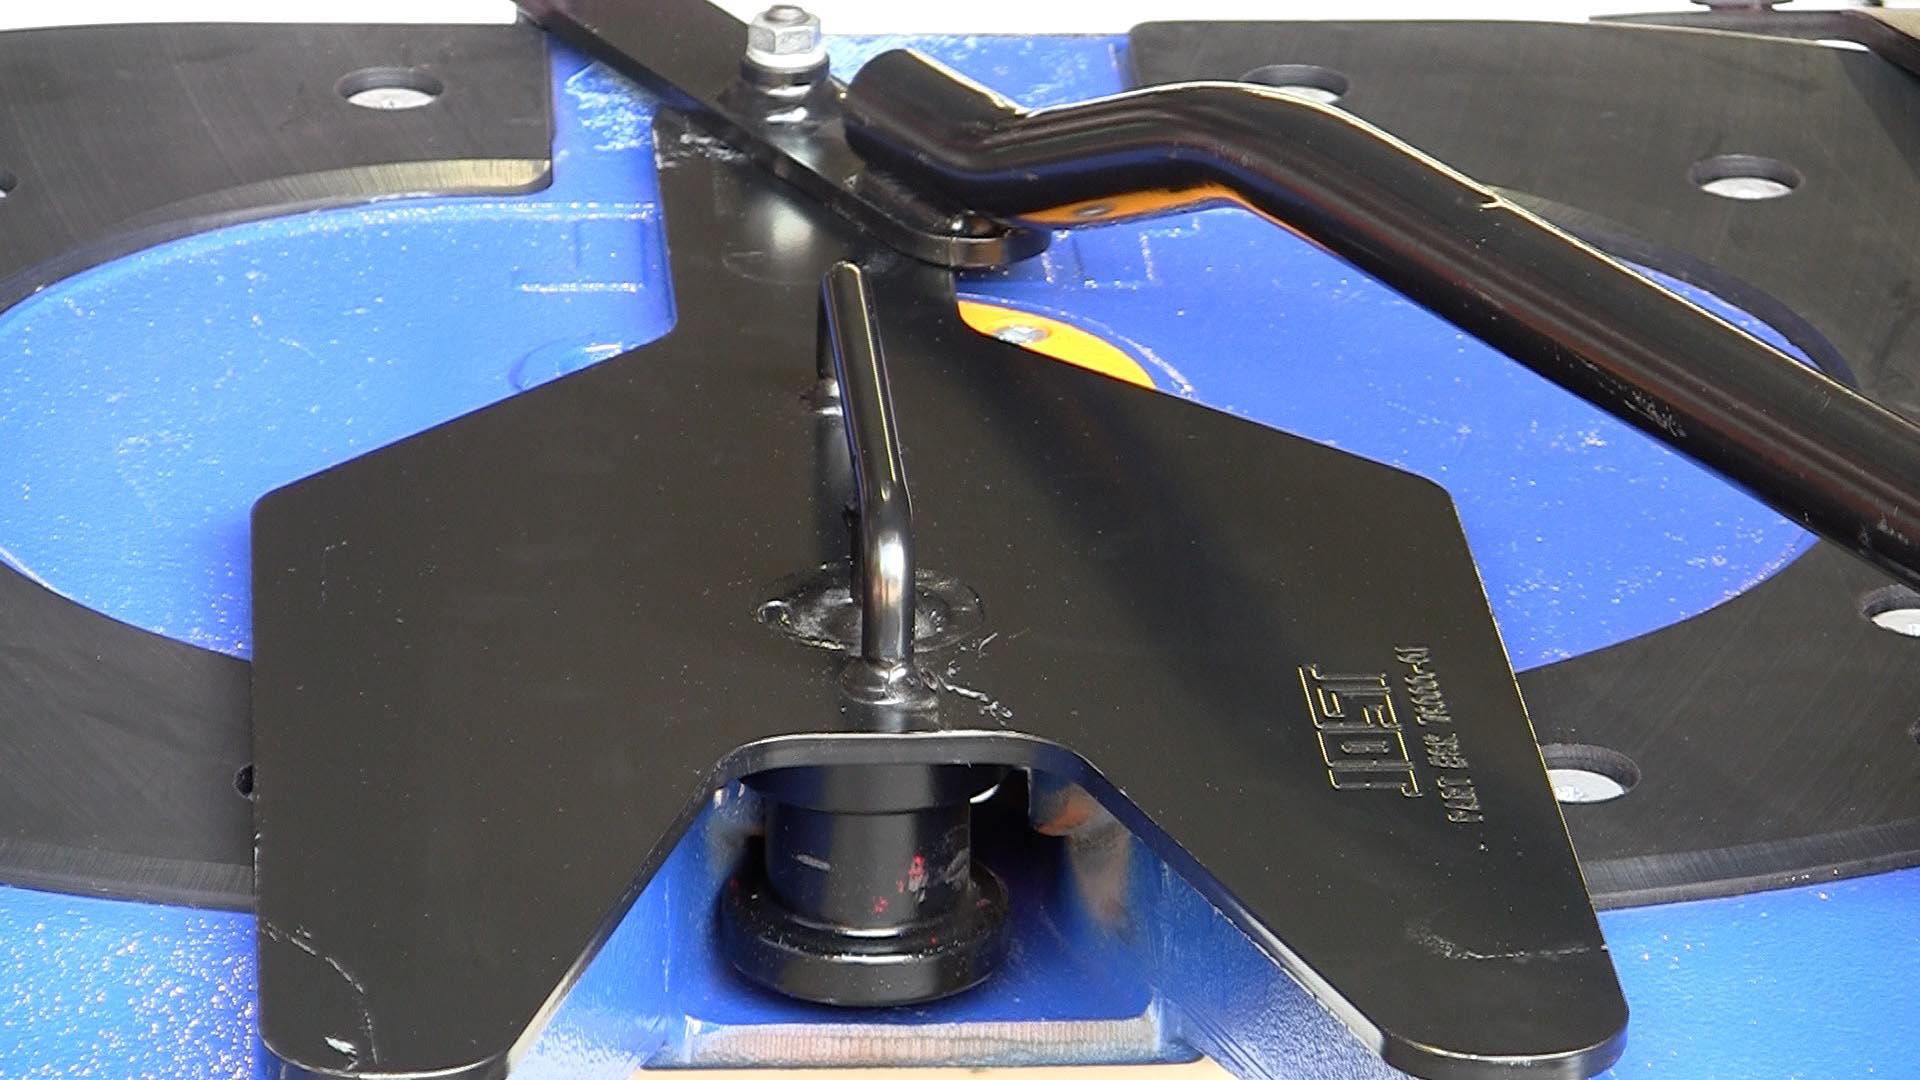
The lock test tool is essentially a flat plate with a new kingpin built into it.
Jost Lock Tester Part#SK76000-00
Lock Jaw Inspection
Another handy tool is the ‘gauge lock jaw’, which is basically a no-go gauge used to measure the wear of the lockjaw. If the Jost gauge will slide over the jaw, then the jaw is worn out and will require replacing.
To use the ‘gauge lock jaw’ checking tool, push the jaw forward, then try to slide the checking tool over the jaw. If this tool does not fit over the jaw, then the jaw is within servable tolerance. However, if this tool does slide over the jaw, then the jaw will need to be replaced.
 Lock Adjustment Inspection
Start by having the fifth wheel in the fully open position. In this position, the jaw is wide open, and the release handle all the way out.
Place the lock test tool on top of the fifth wheel’s top plate with the kingpin in the throat, then place the hook under the front skirt of the fifth wheel. Push the tool’s lever forward till the fifth wheel engages the lockjaw fully around the tool’s kingpin.
On greaseless fifth wheels, it is crucial to confirm the kingpin is sitting squarely in the jaw. To do this, you will need to rotate the tool slightly to ensure that tool is seated firmly on the greaseless pads at both the front and rear of the top plate.

On greaseless fifth wheels, it is crucial to confirm the kingpin is sitting squarely in the jaw.
To check the adjustment, try rocking the tool’s lever forward and backwards to check for movement in the lock. The lock is adjusted correctly when there is no fore or aft movement.
Next, disengage the hook from the front of the skirt and rotate the lock test tool from left to right; the lockjaw is adjusted correctly if the lock test tool rotates freely without any fore and aft movement.
 Lock Adjustment Procedure
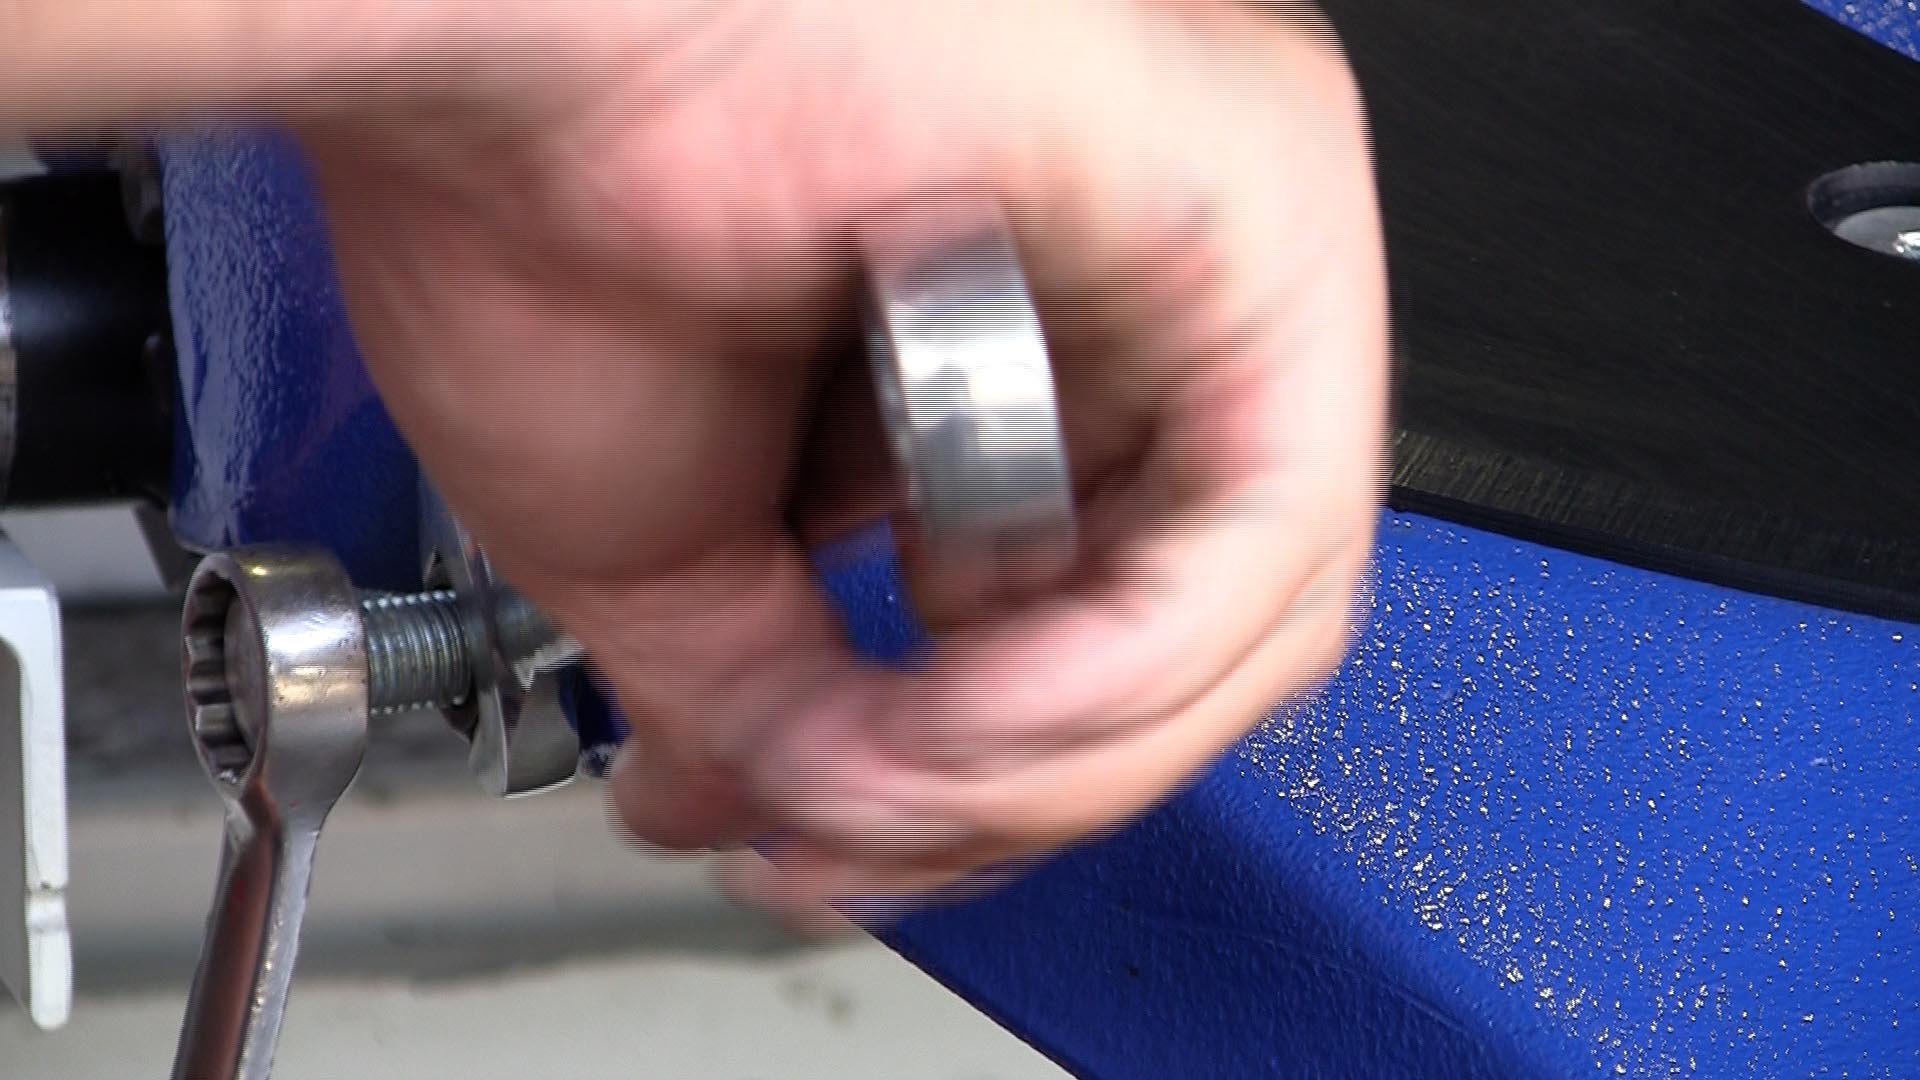
The adjustment screw location is on the left-hand side of the fifth wheel. You will need two 24mm ring spanners or a 24mm ring spanner and 24mm socket to complete the adjustment.
First, loosen the locknut on the adjustment screw. Then wind the adjustment screw outwards till it becomes loose. The lock bar will travel all the way inwards. Now the lock bar is tight behind the lockjaw; it is actually overtight, meaning there is not enough clearance for the kingpin to rotate freely in the lockjaw.
The next part of the adjustment procedure is to wind the adjustment screw inwards until you feel the screw tighten, which is an indication that the adjustment screw is now in contact with the lock bar.
At this point, you will need to get an offsider to raise the fifth wheel’s secondary safety latch, then move the release handle forward towards the front of the fifth wheel and hold it in that position while completing the adjustment procedure.
Now wind the adjuster screw in a further one and half turns. This action will set the recommended clearance of 0.3mm.
Securely hold the head of the adjustment screw with one spanner or the socket, then tighten the lock nut with the second spanner to fix the adjustment screw in position.
That completes the adjustment procedure of the Jost fifth wheel.
However, it is essential to repeat the adjustment check by testing that the tool rotates freely and there is no fore and aft movement to confirm the adjustment was successful.
If you require a ‘Certificate of Completion from this training lesson for your transport compliance, click here to access the online training portal.

